training aid

Virtual Shot - Pistol

  Virtual Shot has come out with their multi platform dry fire mount. I previously reviewed the original mount and app here: Virtual Shot Review. So I won’t be covering much on the APP or rifle parts of it. The new Virtual Shot mount has pistol and scope style mounting platforms that give it even more usability. I’m mainly going to focus on the pistol mount.

  The Virtual Shot shot mount has been upgraded from the original. The mount now has a stouter mounting stem. This stem is the base part in which you can mount the picatinny, pistol, or scope adapters to. When I say stouter, the mounts are now more robust than the original. The stem is also where you mount your phone. The actual phone mounting is way better than the original. It also accepts larger phone sizes. This new phone clamp also holds the phone better than the original Virtual Shot mount. The mount also uses thumb screws to adjust everything. All of this makes a better mounting system for your dry fire practice.

   To change the mounts, Virtual Shot includes a screwdriver and some other parts. Essentially you unscrew that stem system and install whichever mount you want to use. The picatinny adapter is used for both the pistol and AR style mount. It just gets flipped over and mounted differently. For the pistol, there is also an angle mount that extends the phone mount past your muzzle, and then hooks to your pistol's front rail. If using it on a rifle scope, the new ring style scope mount is used to install on the ocular eyepiece of your scope. This sets the phone in front of your scope, so you can use the Virtual Shot system just like you would your normal scope, well kind of. It is still slightly different from shooting in real life, but nothing major.

  Now it’s time to get into the pistol mount and what it does. Since the Virtual Shot is a system, of course you have to mount it to a pistol. The app asks all kinds of questions to make sure everything is unloaded and safe. I used the pistol mount on a Lone Wolf framed pistol, so a Glockish style handgun. Part of the reason I did this is because I used a TTrigger dry fire magazine. The TTrigger mag is currently only made for Glock style pistols. The TTrigger mag allows for the trigger to reset continually on the pistol it is installed on. The TTrigger mag also makes a clicking sound every time the trigger is pressed, think dog clicker trainer. Your phone picks up the clicking sound, so the Virtual Shot app knows you're firing a shot. If you are using other pistol platforms, a DryFire magazine does the same thing. Now, the Virtual Shot app did have a few problems always picking up the sound. Did it cause problems? Not really, because most of the time you can just re-pull the trigger. It did make the “Pistol Competition” harder for me since it had moving targets. Virtual Shot recommends the DryFire mag, so it may work better with the app then the TTrigger mag. If you happen to have an airsoft or pellet pistol that uses some sort of propellant, the mount will also work with those, unloaded of course. Virtual Shot includes a blast diverter to divert that muzzle blast gas away from your phone. Overall I was happy with how the TTrigger mag worked with the Virtual Shot system. After all, it’s way better than just old school dry fire.

  There are some new items in the app. Most of these apply to the new pistol stuff. There are pistol training videos and competitions. All the other aspects of the app will now allow you to use the pistol. As one can expect, the training videos are just exactly what they say, training videos. The Competition section is pretty cool. Every month Virtual Shot has some sort of competition in this section. Sometimes it’s rifle, sometimes it’s pistol, you get the idea. But what is cool about this section, is that you play for actual prizes! You compete with other people using the app. I did get 2nd or 3rd once with the pistol. Since I received the Virtual Shot stuff for free, I didn’t feel right getting a prize, I think I may have talked them out of it. I will mention that it took me forever to get the score I got. But don’t fret, it takes your highest score no matter how many times you try. It really is pretty cool testing your skills against other people from around the world.

  When using the pistol in the Virtual Shot app, there are different sight options. These different sighting options haven’t changed, but some of them are more rifle’ish. There is still a red dot, circle dot, crosshair, AR style front sight, etc. All of these can be sized up or down. I tended to use the circle dot or just plain red dot. You can also move them around the screen. This movement allows you to line the sighting system up with your sights. If you are using an actual red dot, just line the apps dot up inside your dot, as you are looking through it. I used an iron sighted pistol. So I lined the red dot, in the app, up with my sights, then turned it to super small. This allowed me to use the iron sights. I will say that I quickly went to the circle dot and used it instead of my pistol's iron sights. It would be nice if they had a pistol front sight, similar to the AR one, to use in the app. But, the way I did it worked fine. 

  The new mounting systems from Virtual Shot is far better than the original one. Yes, the app still has all the great features it previously did in my original review. The new “play with friends” and “competitions” are the only real new app features, and they are pretty neat. Having the ability to play the “mini games” and “challenges” with a pistol brings a whole new aspect to the Virtual Shot system. If you are looking for something different to help you with your dry fire practice, look into the Virtual Shot system.

Firearms Insider Reviews - 8 Key Points

Claim to Fame:

Dry fire training aid

Target Market:

Those who want a unique dry fire experience 

FNBs (Features & Benefits of this product):

  • New mounting system for phone

  • Pistol mount option

  • Scope mount option

  • Effective bullet drop and wind drift

  • Customizable ranges

  • 100+ shooting levels

  • Mini games

  • Practice ranges

  • Shooting analytics

  • Video Shooting courses

What other aesthetic options or finishes are available?

None

What others are saying?:

Nothing really found on just the pistol portions of the app

Link to other reviews:

TFB review of original Virtual Shot

Price point:

MSRP = $149.00

TTrigger mag as used - $104.99

I need it now! Availability:

Virtual Shot

Our Rating:

Pros:

  • Great dry fire training aid

  • New mount is nice

  • Scope mount ring

  • Better picatinny mount

  • Pistol mount

  • Can be used on airsoft pistols

Cons:

  • Doesn’t always pick up clicks from dry fire magazines

  • Apps auto reset is a little slow

Score: 7.50 Good

Favorite Link:  Original Virtual Shot Review 

Virtual-Shot

  When it comes to firearms training in today's world, you almost need some sort of dryfire practice system. Virtual Shot is just that, a dryfire training app for your phone. It includes a phone mount and an ocular lens to use as a scope within the app. Virtual Shot does even more when paired with a trigger reset system like the Mantis Blackbeard or airsoft style rifles.

  When purchasing Virtual Shot, you are buying the rifle mount and a code for the app. They just released a pistol mount version, if that’s your thing. The Virtual Shot mount has two pieces. The phone mount and the “ocular” lens. The mount has a picatinny base which allows it to mount on any rail, etc. Part of this mount is the adjustable holder for your phone. It uses a little thumb stud to slide a rail up and down. Just put your phone in it horizontally and slide the thing down until it is tight, then snug the thumbscrew up. My phone fits snugly with the mount all the way expanded. The phone is right at 3” wide. I also have to take the case off of my phone to get it to fit. However, Virtual Shot’s pistol mount is supposed to accept wider phones. The ocular lens then slides in, up against your phone, to make it possible to see your phone close up. It literally makes it like looking through a scope. 

  The Virtual Shot App:

First thing when the app opens, there is a safety screen. The screen makes you check boxes for safety. If you don’t check the boxes, the app doesn’t open.

Then the main screen appears. The main screen lets you choose what you would like to do. Ranges, Skill Development, Mini Games, Armoury, and Range Builder (only available in the Pro version). There is also a settings button in the corner. The “settings”  button is where you get to choose between yards/meters, trigger reset type, shot detection rate, and most important - if you want a scope, red dot, or pistol. My favorite to use is the red dot option.

Ranges: This is where you go to practice “range” style shooting. In this menu there are three options: Open Range, Gallery Levels, and Mechanical Ranges. The Open Range is just that. You can practice on various different targets and distances. This is a great place to start with the app. The Gallery Levels include IPSC, Speed Steel, Accuracy challenges, and many more pre-built shooting style stages. The Mechanical Ranges has options like the US Army rifle marksmanship qualification and Shoot/No Shoot stages.

Skill Development: This is where you can watch instructional videos and then put what you learned to a test in the “Training Levels”.

Mini Games: My absolute favorite part of the app. As the name states, they are games. The “Junkyard” has various targets set up for you to hit in 1 minute. It then gives you a score. It also keeps track of high scores from other users of the app. This lets you try and beat them. It has “Hunting Levels” which are pretty self explanatory. Then there’s “Zombie Survival” and “Zombie Levels”. You shoot zombies and progress as you finish levels. The zombie survival keeps track of how long you can stay alive. Then there’s the “Blackhawk Down” game. In this game, you shoot characters that are shooting at you, once you get enough damage, you die and your score is your time survived. It’s set up like the streets in the Blackhawk Down movie - kind of.

The Armoury: This is where you go to change your scope reticle, if you are using a scope. As of right now, there are 5 scope reticle options. You can also change ballistics from this tab. Virtual shot has pre-set calibers, but you can also change them with your own ballistic data. 

Range Builder: This is on the Pro version only. Here you can make your own stages using steel or paper targets. This could be really useful if you want to design a USPSA or Steel Challenge stage, and then shoot it to see how it works out. It only saves the current setup, so you can’t make multiple ones and save them for use later.

  The Virtual Shot system is very comprehensive. In it you can change from an auto reset trigger to a manual reset trigger, for use on firearms that don’t automatically reset the trigger, like a bolt action. The time can be set from 3 seconds to 10 seconds in four increments. The reason for this is because the app registers the hammer fall sound to distinguish firing. Cycling the bolt would then register as another shot. I tried this out for a while. It does give enough time to cycle the bolt manually. The auto trigger setting is what I used most of the time. It works very well with the Mantis Blackbeard system. A problem I ran into with the Virtual Shot system, was the 0.5 second reset when in the auto mode. I would get on target faster then the app would register. So when doing the “Bill Drill” in the app, it would take me 3 seconds longer than in real life. The app does a pretty good job of tracking the movement of the firearm. But every once in a while the app would glitch and throw the rifle off target. But since it’s not “real life” it only affected my ego. 

  Having the ability to change reticles in the Virtual Shot app is very useful. When the scope is selected, the 5 different reticles let you choose from a hunting style duplex to a mil-dot style reticle and a few in between. I liked the mil-dot reticle since it actually gives some sort of range estimation and bullet drop. Another feature of using the scope is the ability to zoom in from 1x to 30x. One can select the power in increments from 1x-3x-5x-10x-15x-20x-30x. When using the Red Dot reticle setting, the dot size can be changed from small to large, with 4 or 5 sizes in between. Also in the red dot portion is a circle-dot, crosshair-dot, crosshair-circle-dot, along with an AR front post. All of these options have the ability to change sizes too. When messing around with the Virtual Shot, I mounted it behind an actual red-dot. Then I adjusted the dot, in the app, to be in the center of the real red-dot. This gave me a sense of realistic training, as I was looking through the real red dot’s tube and using the Virtual Shot system, just as I would normally on the range.

  One of my most loved and hated parts of the Virtual Shot is it’s realistic ballistic data. It calculates wind and drop of the various calibers. So when shooting farther away, one must figure in bullet drops. It has some preloaded ballistic data to choose from. But these can also be changed. The Virtual Shot will allow you to change Sight Height, Muzzle velocity, Ballistic coefficient, Bullet weight, and bullet diameter. So if you know all these, you can tune the factors in Virtual Shot to your ballistic data, therefore making it even more like shooting your firearm. Since it mounts on your firearm, all the other training aspects like trigger pull, fit, weight, etc. are already built in. 

  The Virtual Shot system has a lot of good things going for it. It brings another feasible way to dry fire train. With it’s adjustable dot sizes and different scope reticles, you get a lot of options. For practice, it is an all around useful tool that uses your personal firearm. Plus the games just make it even more fun to train. If you're looking into a dry fire training application, take a look into the Virtual Shot system.

Firearms Insider Reviews - 8 Key Points

Claim to Fame:

Extensive training app and system

Target Market:

Those wanting a virtual training system

FNBs (Features & Benefits of this product):

  • Phone mount and ocular lens

  • Affective bullet drop and wind drift

  • Customizable ranges

  • 100+ shooting levels

  • Mini games

  • Practice ranges

  • Shooting analytics

  • Video Shooting courses

  • Works with Mantis Blackbeard

What other aesthetic options or finishes are available?

Pistol mount

What others are saying?:

5/5 stars at VirtualShot

I have had some time to play around with the Virtual-Shot and absolutely love it.  I know I am just scratching the surface but so far it is very impressive.

Link to other reviews:

Nothing found

Price point:

MSRP = $97.00

Retail = Same

I need it now! Availability:

VIrtual Shot

Our Rating: 

Pros:

  • Various training options

  • Mini games

  • Uses your firearm

  • Preset stages and qualification courses

Cons:

  • Slow shot reset (0.5 seconds)

  • Smallish phone adapter

  • Tracking sometimes jumps

Score: 7.50 Good

Favorite Link:  Mantis Blackbeard Review

MantisX

 If you haven’t heard about the MantisX shooting system, you are missing out. If you are interested in improving your shooting, MantisX could be the help you need. This is the easiest training system I have used. Mantis did send this out for review, and I was pleasantly surprised at what it can do. All you need is a smartphone or tablet and the control module to get started.

 The MantisX is a novel concept in the shooting world. The smart sensor, which attaches to your rail, is only half of the training system. The other half being the app, which I’ll discuss later. At just under 2” long, 1.375” wide, and 1” tall, it doesn’t add much size to the firearm. It also only weighs 1 ounce. So you really don’t even notice it’s on the firearm. The smart sensor comes with a charging cord and a nice little carrying case. I just use my phone’s charger and cord and it works fine. I never use the carrying case since I seem to always have it mounted on a firearm. On the bottom of the sensor is also an on/off button and led to show when it’s on. The smart sensor basically senses tiny amounts of movement in the firearm. Then it relays that, via bluetooth, to the MantixX app. Then all the magic happens.

 I said the app was half of the system, it is probably more like 90%. The MantisX app does so much, that I will likely forget something about it. First up, it has training courses, with the first one being an introduction. The intro course basically take you through how the app works along with some training shots. The other courses are Basic marksmanship and a FBI Qualification course. The FBI course has to be done with live fire, but the others can be done with dry fire.

 The other part of the app is the “train” section. In this Train section it has: Open training, Shot timer, MantixX Benchmark, Timed Benchmark, Surprise Break, Reload in Battery, Reload out of Battery, Reload Tactical, Primary hand only, Support hand only, and Cadence of 0.5, 1.0, & 2.0 seconds. Once you have used these, there is a history tab that keeps track of them. I like the history tab because it lets me see how I am doing over time. It also tracks how many shots you have completed on each “train” tab. The History tab at the bottom of the app will also show total number of shots fired. A really nice bonus to keep track of how many rounds have been fired through a particular gun.

 If you are into competing with your friends, or even people you don’t know, the MantisX has a “groups” tab. In the groups, you can enter a friends name to compete or compare with. The tab also has groups that you can add. All of this helps you to compare how you are doing with others. It can help you improve your skills by making you accountable. But you don’t have to use this feature if you don’t want to.

 Last up is the “settings” tab. It is not all that one would think. In it, it has rifle or pistol selection. Right or Left hand. Live fire, Dry fire, and CO2. I don’t have a CO2 pistol to try it on, but I have used Mantis’ at a shooting event, using the CO2, and it worked fine. There is also a sensor mounting direction and location. I actually mount the sensor on the bottom and backwards on my pistol. With it mounted backwards, I have access to the charging port without having to remove the sensor. When you select rifle or pistol, it has a very long list of manufacturers to choose from. I usually use mine on a Polymer80, so I chose the Glock 19 and it works great. If your firearm doesn’t have a mounting rail, Mantis offers adapters for certain pistols. Of course there are also the normal app settings along with an instruction guide.

 I’ve been using the Mantisx since I received it. Mostly with dry fire practice, but some live fire. I even mounted it to a rifle for testing. Within the sections, for instance in the “Open Training,” The app gives you a list of scores, time between shots, etc. If you swipe left, a round chart comes up with an average score. Around the center circle are red areas. When you touch one of the red areas, it brings up what was possibly wrong during that shot and then how to correct the issue. If you swipe left again, it brings up a graph with trigger press movement and stability. Swipe left again and see an actual movement display for each shot.

 Now that I went through a lot of the functions, here are my thoughts. The MantisX is a really useful training tool. If nothing else, it gets you to dry fire more. I even got my family to try it out. Once in awhile during dry practice, the MantisX didn’t seem to want to pick up every shot. What I thought was weird about it, was that the phone was only a foot away. I just reconnected the sensor and it worked fine. I did notice that during range time, if I was too far away from my phone, it wouldn’t register shots either, so just keep your phone in your pocket and it will work fine. The sensor worked good no matter where, or how, it was mounted. I mounted it at the end of a 15” handguard, as well as right up on the receiver, without any problems. I really like all the charts, graphs, etc in the app. You will need a holster for a light if you want to do draw and fire practice. I really liked how the app accesses what you did wrong. This was especially helpful during live fire when recoil can offer up more challenges.

 If you’re in the market for some sort of training app, I would go check out the MantisX. If nothing else, it is fun to see what is going on with your shooting. At a price of $150, it won’t break the bank either.


Firearms Insider Reviews - 8 Key Points

Claim to Fame:

App based firearms training system

Target Market:

Anyone wanting to improve their shooting skills

FNBs (Features & Benefits of this product):

  • Rail mounted sensor

  • USB charging

  • Bluetooth connectivity

  • Small and lightweight

  • Carrying case

What other aesthetic options or finishes are available?

Adapters for magazines and other firearms without a rail to mount the Mantis X on

What others are saying?:

R.King on Amazon 4/5 stars

It works as advertised - a must have tool for both students and instructors

I think this tool is great for both instructors and students of marksmanship. Not only does it save you plenty of money on ammo, it lets you see exactly how you are pulling the trigger visually. This has helped me alone better understand how my trigger pull has been affecting my shots. I already knew this. However being able to SEE it made a nice difference.

I have yet to try it at the range. I have been dry firing daily trying to improve my trigger control. I will be going this week likely and see how much I have improved.

Pros: Works great, many settings to choose from, visually appealing, visually educational. I plan on using this tool with my students if they are having trouble with trigger control.

Cons: This is a very very small con, as MantisX explains, they are continually updating the software. However, there are times when it does not detect dry fires. However it is NOT a deal breaker at all. Just shoot again. Where it becomes a problem though is when you are doing timed shots. Other than that, I really have nothing bad to say about this product. Also, mine didn't come with a "pelican case." It was just a zipper case. Still good quality.

Suggestion: It would be very helpful if it came with a quick release rail mount or something. It is a little pain in the ass to have to remove it every time I want to carry or holster. Granted, it isn't difficult to remove, more of an inconvenience. However, if you already have a holster cut for tac light or something, this might not be a problem for you.

Link to other reviews:

The Truth About Guns

Price point:

MSRP = $149.99

Retail = $149.99 at MidwayUSA

I need it now! Availability:

MantisX

Our Rating:

Pros:

  • Easy set up

  • USB charging

  • Lightweight

  • Diagnostics of shooting

  • Fun

  • Shot number tracking

  • Movement graph

Cons:

  • Sometimes it didn’t want to read shots

Score: 8.5 Great

85.jpg


Favorite Link:   Axelson Tactical


LaserLyte Trainer 22 LT-LR Review

Laserlyte Trainer 22 LT-LR Training with a 22 caliber pistol or rifle used to be the cheapest way to shoot all day, but these days with ammo availability thats no longer the rule of thumb. While some turn to dry fire practice in the comfort of their own home, there's a limit to knowing precisely if your shots are breaking true at your intended target reference point.

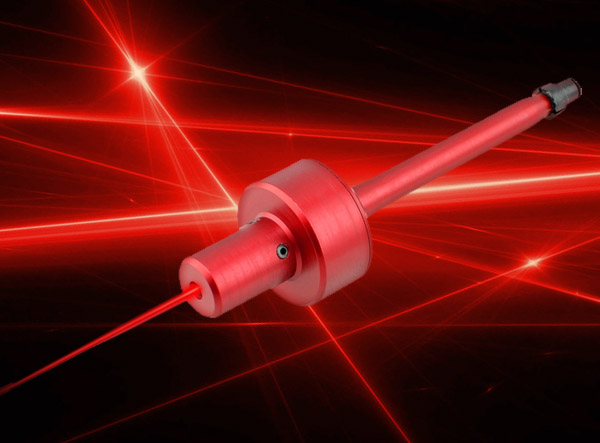
Laser products help achieve precisely that, giving the shooter instantaneous feedback as to where that hypothetical bullet would have gone in relation to your sight picture and trigger press. LaserLyte has produced a number of different caliber laser product that interface directly with your own gun so that you can train with the same controls, weight, and familiarity of your own firearm. The Trainer 22 LT-LR was recently release and is uniquely universal to 22 caliber firearms. Be it 22 lr, 22 short, 22 long, 223 Rem, 22-250 or any other cartridge in the 22 caliber family, the LaserLyte Trainer 22 LT-LR simple installs through the muzzle and into barrels with a minimum length of 1.875" inches. There is a small black plastic arbor on the end of the Trainer that expands when an even smaller screw is tightened, which lets the use firmly install in a barrel with enough friction to prevent it from falling out due to gravity.

I found that for use in a pistol, double action is best to have. That way you don't have to rack the slide and reset the trigger each time, you can just keep pulling that bang switch while pumping up your finger strength in the process.  For my T&E I used a Ruger SR-22, but a revolver or other semi auto with a hammer should work well too. The width of the trainer at its fattest point is about 3/4 of an inch, so depending on your gun of choice it may or may not be wider than the muzzle, thusly interfering with the holstering of the firearm.

The T&E model I received worked during the first day of experimenting but a week or so later when conducting the official review the laser seemed to have some problems. The activation became inconsistent, and then non existent altogether. I did replace the 1x1632 coin battery and it functioned consistently once again, however the brightness of the laser was not enough to activate some LaserLyte Laser Plinking Cans I was testing for another review. I used a different manufacturer's laser boresight to verify the targets functioned properly and that the Trainer was the issue. This is reflected in my rating, which will be updated when the manufacturer gets back to us.

Being 22 caliber, the manufacturer claims it is compatible with multiple 22 caliber platforms, but not specifically any type of model. I found that while it will mount in the barrel of a Ruger MKIII 22lr pistol, a 223 Rem AR-15 Carbine, and a 22-250 bolt action rifle, it will not necessarily activate upon dry firing. The sound and concussion from the trigger/sear/hammer is what makes the laser activate, and the potency of that effect really varies in every firearm. I do believe that longer barrels are a contributor in dampening the sound from reaching the Trainer. Racking the bolt, charging handle, and slide would set off the laser but the dry fire of the trigger in most cases would not. Based on my experience using the firearms I had access to, I would say this product is ideally meant to work best in pistols, even more so in revolvers because the solidarity of the frame would allow the transfer of energy from the hammer to the Trainer most efficiently.

From a design and operation standpoint, the on/off of the Trainer is very minimalistic. You just unscrew slightly to cut the battery off from completing the circuit. This isn't ideal, especially when the exterior of the Trainer has no texture, so big fumbly fingers like mine had difficulty unscrewing the two halves especially if overtightened during use. I had to be extra conscious not to overtighten the Trainer.

Overall I would say that malfunctions aside, this training aid is very useful for dry fire practice indoors, especially when used in combination with a laser compatible electronic target system, like the LaserLyte Reaction Tyme Target (see FI review).

Firearms Insider Reviews - 8 Key Points

Claim to Fame: Simply the easiest way to train without ammo for any of your 22 rimfire pistols.

Target Market: Gun Owners who want to add laser functionality to their dry fire practice, safely and indoors.

FNBs (Features & Benefits of this product)

  • Compatible with: 22LR, 22WMR, 22 Short, 22 Long, .223 REM with at least a 1.875" barrel
  • Length: 3.0 inches
  • Diameter: .20" Min./ .76 inch Max
  • Battery Life: 10,000 shots
  • Batteries: 1 x 1632 Lithium
  • Activation: Sound of striker or hammer
What other aesthetic options or finishes are available?:  none

What others are saying?:

Price Point:

I need it now! Availability: Readily available at Brownells.com or Amazon.com

Our Rating: UPDATE +-Easy to operate +-Short enough to fit most pocket pistols or snubnose revolvers +-Battery life is high, batteries are hard to find + Tested and confirmed functional in Ruger MKIII Pistol, Ruger SR22 Pistol, Ruger 10/22 rifle, AR15, and Savage 22-250 rifle + Customer Service was very responsive in replacing first malfunctioning laser Trainer with a correctly working model

  • No knurling to assist with unscrewing, which is the only way to preserve batter life.  Overtighten= Bad Time

Score: 8.5 Great* *Score increased after initial defective model was replaced and reevalutated

LaserLyte Laser Plinking Cans Review

LaserLyte Plinking Cans Plinking cans has been the quintessential method of target practice since the dawn of the first firearms. Cowboys would shoot empty bean cans out on the range to hone their skill. Heck, even today there's still something so iconic about setting up empty cans, taking 10 paces, and then trying to knock them down with the speed and accuracy like that of the legends of the Wild West.

With modern ammo prices and range fees, plinkin' ain't cheap! That's why this product from LaserLyte is so exciting. With the Laser Plinking Cans, you can literally plink all day long indoors til your heart's content, without blowing through costly ammo, picking up brass, or putting on pants for that matter!

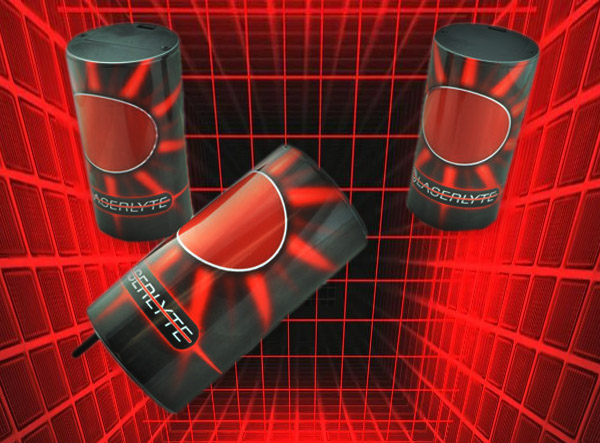
The Laserlyte Laser Plinking Cans are small, like a classic can of V8. They have a solonoid wired to a receiver, so when the target area gets hit with a laser, a plunger is extended out the bottom about half and inch which will topple the device over. After you knock down all targets, simply push the plungers back in and set them back up. It's easy to see with just the first time knocking one over how fun it is, it rushes over you and puts a smirk on your face.

In testing the Laser Plinking Cans, I found that the receptors are sensitive to more than just a laser. The wrong indoor lighting and even natural light from outdoors will set the can off, resulting in an auditory CLICK, CLICK, CLICK, CLICK of the solonoid tripping until you either switch the unit off, or cover the target from light and move it to a darker location. Reading other reviews online I see more users have had the same difficulty. It's an unfortunate flaw of oversensitivity that really detracts from the enjoyment of using them, as you try different corners of the room or switching off lamps and lights desperately trying to keep the cans from "prematurely plinking" themselves. Not to mention that the cans themselves are dark colored, so you may find using these as a low-light scenario training aid more difficult, but a roll of flourescent paper with a hole cut out would be an easy remedy to help put these cans in your sight picture when in a dark room.

Another issue I had is that the set does not come with a laser device. You must buy separately a laser training product (preferably LaserLyte) in order to use these cans effectively by dry firing. For the price tag of over $100 dollars and the seemingly simple design / manufacture of these cans, I would assume including one of their training guns would have been feasible for around the same price point. If you already own an actual gun that you'd like to practice with, you can buy a laser cartridge for it.  The only hangup being if its not a double action firearm, you will have to rack the slide each time, resetting the trigger in between engaging the cans.

Overall, these are a novelty BUT a very enjoyable niche target that will offer safe practice indoors. New or unexperienced shooters should really enjoy using these, especially with a plastic blue gun with a laser trainer installed as it takes some of the intimidation factor out of the equation while still being able to practice the laws of gun safety and the fundamentals of proper shooting technique. As easy as these plinking cans will become a party game to some, it can still be a vital training aid used to teach new shooters or help experienced shooters perform better.

Firearms Insider Reviews - 8 Key Points

Claim to Fame: The LaserLyte® Laser Plinking Can Set provides hours of training and entertainment indoors or outdoors without the cost of ammunition or the time spent cleaning up.

Target Market: Both new and experienced shooters with existing Laserlyte products who wish to practice with reactive targets indoors.

FNBs (Features & Benefits of this product)

  • Weight: 4.25 ounces/.12 kg
  • Length: 3.82 inch/9.7 cm
  • Diameter: 2.00 inch/5.1 cm
  • Battery: 9V       
  • Battery Life: 8,000 Tip Overs
What other aesthetic options or finishes are available?:  none

What others are saying?: “The LaserLyte worked as they advertised. The laser light had to be in a room with ambient light no direct sunlight or any direct light that could hit the can sensor. The pop out plunger would activate continuously. If I try to use the laser light outside it had to be at dusk no sunlight even in the shadows the ambient sunlight with activate the sensor on the can. The laser light would work well in a room that had no light but the outside ambient light through a window with covering or In a garage with soft-light. It did work outside but with very low light, there was no problem using a laser out to 25 yards to activate the sensor on the laser light. I would recommend this product, but be advise to the buyer you will have limitations to the use of this product." Amazon Review

Price Point:

I need it now! Availability: Readily available at Brownells.com or Amazon.com

Our Rating: + Cans are easy to operate / install battery K +-Provides new shooters a safe atmosphere to practice + Gives experienced shooters a fun training aid - Very sensitive to ambient light, can be frustrating to find an adequate place they will work - Can itself is black with dark red graphics and target area is murky red color and hard to adequately see in low light were laser performs best - Would like to see training pistol (blue gun) included

Score: 7.0 Good

Laser Ammo - LaserPET Electronic Target

Laser Ammo - LaserPET Electronic Target This is a great way to practice at home without shooting up your house. It’s pretty simple to use and comes with instructions(who uses them?) Shooting it with the Laser Ammo Sure Strike provides instant feedback if you hit it. It has three modes, all which can be used to improve your overall shooting. Using the hit counter mode you can work on your trigger control and it keeps track of your hits. The shot timer mode is for working on your quick draw/first shot from the holster. Lastly is the magazine change mode in which, you guessed it, you practice fast mag changes. One thing I found this extremely useful for is teaching new shooters proper technique in a safe environment. I’m sure you’re as at home on the range as I am but a new shooter may be more comfortable learning to “shoot” in the safety and comfort of their own house, away from other shooters. Most of all you don’t have to worry about be shot by an overly excited person waving the gun around because “They hit the target!!!” even though I still yell if I get swept by the muzzle. The only issue I had with the timer is that I tossed it on my bed with the tripod attached and folded underneath and it broke it open like a clam shell. It was a nightmare and a half to get it back together with how the buttons fit in it. After I got it back together I threw some super glue on it and it’s been good ever since. Granted, if I had removed the tripod I probably never would have taken it apart. Hopefully you guys will learn from my mistake. laser pet Firearms Insider Reviews - 8 Key Points Claim to Fame: Improves drawing, target acquisition, and trigger squeeze.

Target Market: Home defenders, police, military

FNBs (Features & Benefits of this product):

  • 1.8x1.8" laser sensor
  • Bright numeric LED display
  • Buzzer
  • Changeable target cards to modify target area size and shape.
  • Tripod and wall mounts
  • AAA Battery operated
  • Operational Mode: Hit counter - this setting will count the shooter's consecutive hits
  • Operational Mode: Shot timer / Fast draw - this timer will show the accurate time from buzzer to hit
  • Operational Mode: Magazine change - this mode will time the shooter as if they were changing a magazine and subsequently count how many times the shooter can hit the target within 5 seconds
  • Built in timer
  • Input for external sensor

What other aesthetic options or finishes are available?: It’s only available in one form, regular.

What others are saying?: “...improved my trigger control and accuracy 150%”- amazon.com “Works with LASERLYTE Trainer Pistol Universal.” - midwayusa.com

Price point:  MSRP = $119.95 laser-ammo.com Retail = $112.75 amazon.com

I need it now! Availability: Check your local gun shop or anywhere that has gun stuff. Or if you live by me, I’ll let you borrow it.

Our Rating: + 3 operational modes. + Multiple target inserts. + Standard tripod mount and wall mount. + Collapsible tripod. - Broke when I tossed it on my bed. - Hard to put back together if opened.

Score: 8.585